Hyundai Santa Cruz: Brake System / Brake Pad

• Be careful not to damage the parts located under the vehicle (floor under cover, fuel filter, fuel tank and canister) when raising the vehicle using the lift.(Refer to General Information - "Lift and Support Points")
1.Loosen the wheel nuts slightly.Raise the vehicle, and make sure it is securely supported.
2.Remove the front wheel and tire.(Refer to Suspension System - "Wheel")
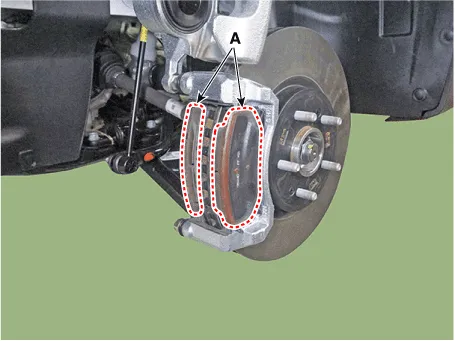
3.Up the brake caliper body (A) by loosening the guided rod bolt.
Tightening torque :37.3 - 41.2 N.m (3.8 - 4.2 kgf.m, 27.5 - 30.4 lb-ft)
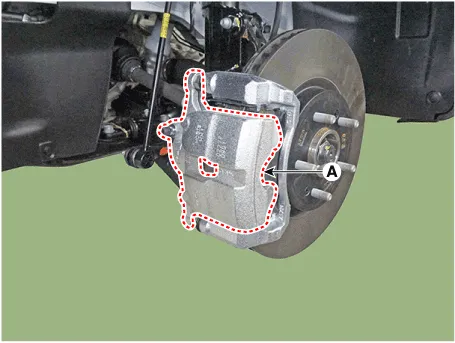
4.Remove the brake pad (A).
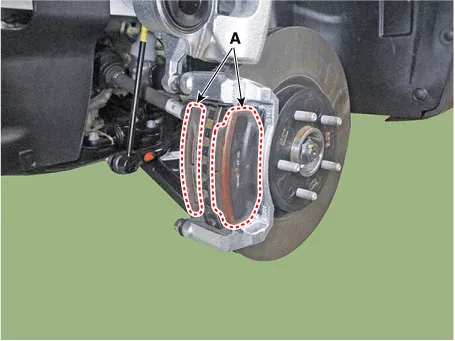
5.Replace the pad liner (A) with a new one.
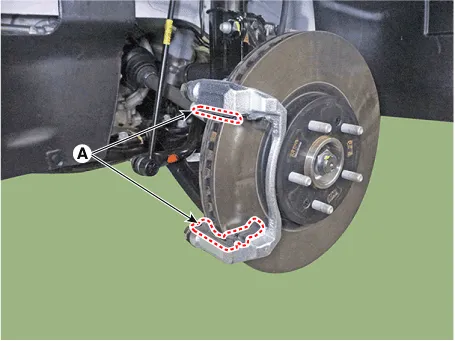

• Brake apply a small amount of grease to the areas marked with "X" on both ends of the new product.(Be careful as excessive coating may cause noise due to contamination on the disk or friction material.)
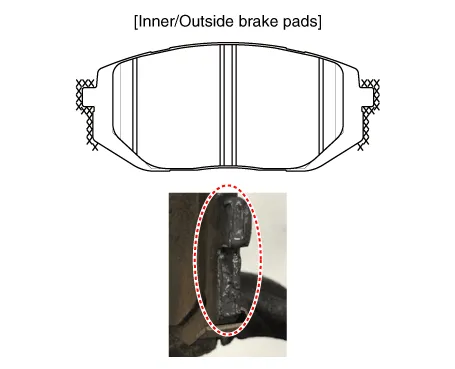
6.Replace the brake pad (A) with a new one.

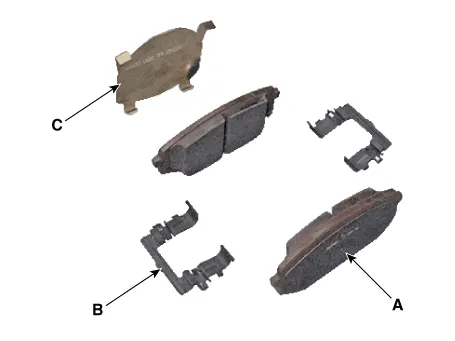
• When replacing the brake pads, replace both the brake pads (A), pad return spring (B), and pad cover shim (C).
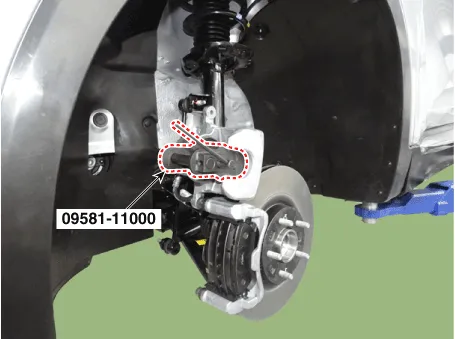
7.Use a SST (09581-11000) when installing the brake caliper assembly.
8.Install the caliper body (A) then tighten the guide rod bolt.
Tightening torque :37.2 - 41.1 N.m (3.8 - 4.2 kgf.m, 27.4 - 30.3 lb-ft)

9.Install the front wheel and tire.(Refer to Suspension System - "Wheel")
1.After installing the rear caliper, perform “Brake Pad Replacement Mode” using the self-diagnosis.
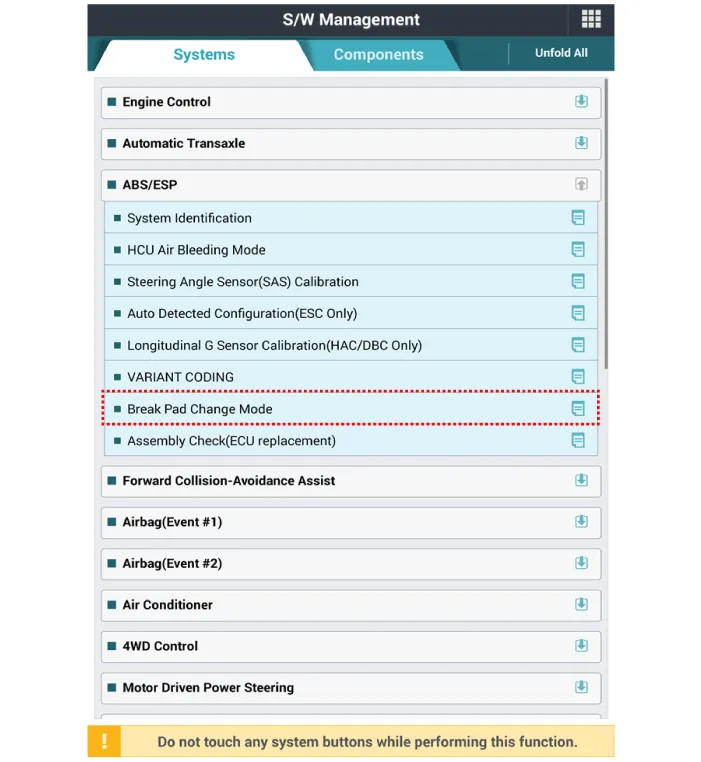
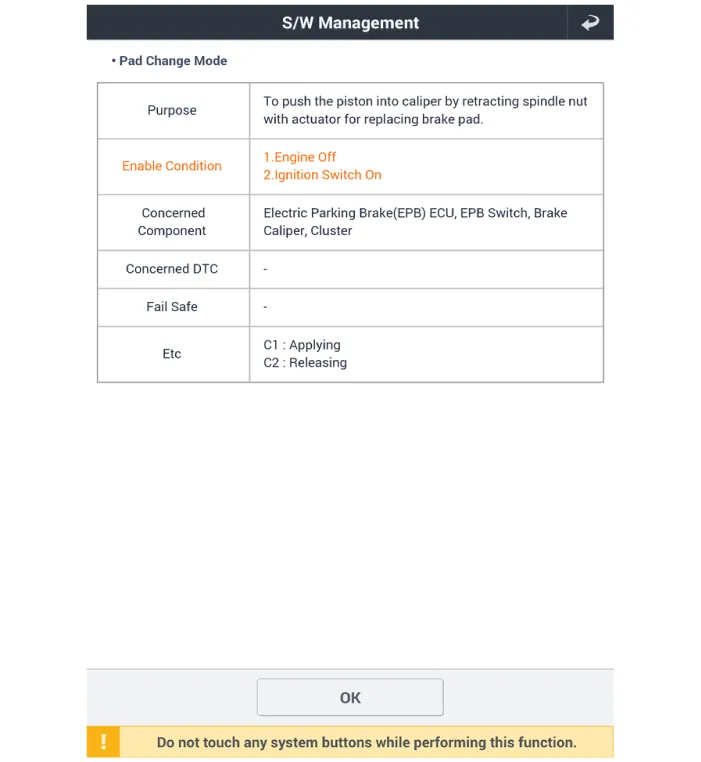
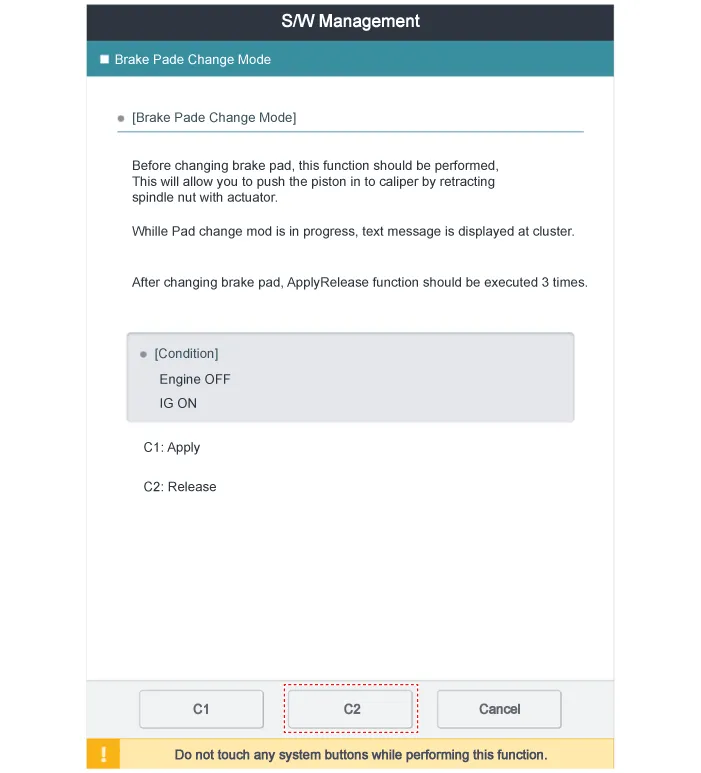
2.Select C2 (Release) on the screen below.
3.Loosen the wheel nuts slightly.Raise the vehicle, and make sure it is securely supported.
4.Remove the rear wheel and tire.(Refer to Suspension System - "Wheel")
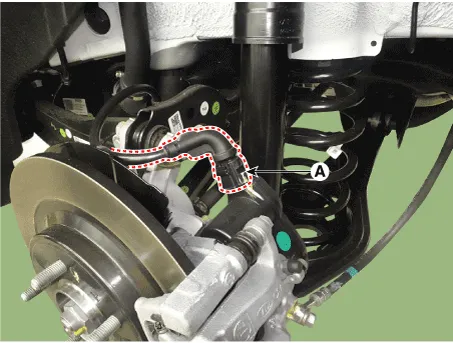
5.Disconnect the EPB connector (A).
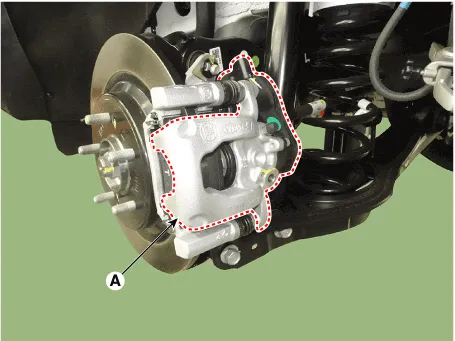
6.Remove the guide rod bolt and then pivot the caliper body (A) up out of the way.
7.Remove the brake pad (A).

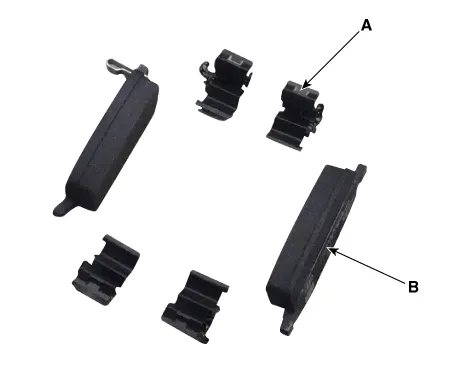
8.Replace the pad return spring (A) with a new one.
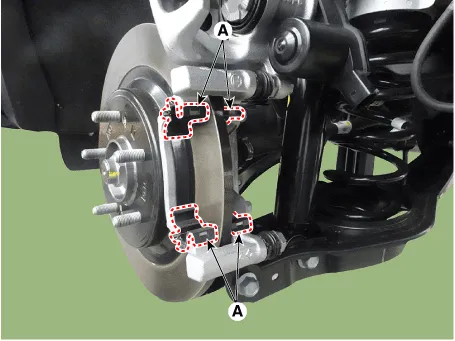
9.Replace the brake pad (A) with a new one.
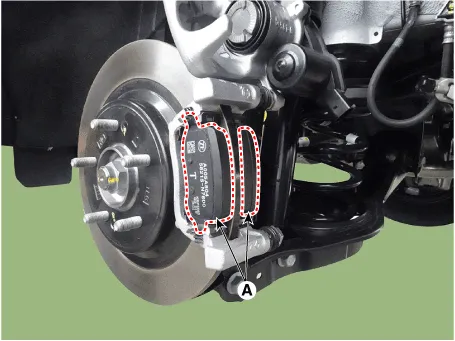

• When installing, use a new one pad return spring (A), brake pad (B).
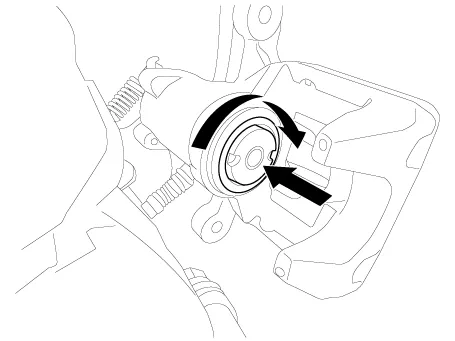
10.Rotate the caliper piston and push the direction of the arrow.
11.Install the caliper body (A) then tighten the guide rod bolt.
Tightening torque :37.2 - 41.1 N.m (3.8 - 4.2 kgf.m, 27.4 - 30.3 lb - ft)
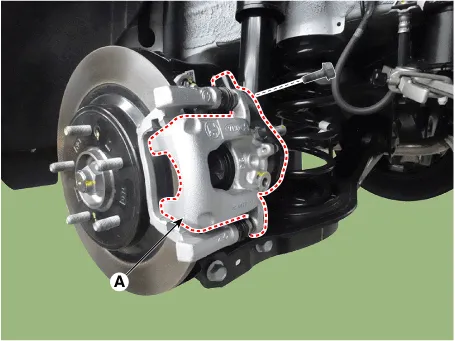
12.Install the rear wheel and tire.(Refer to Suspension System - "Wheel")
13.After installing the rear caliper, perform “Brake Pad Replacement Mode” using the self-diagnosis.
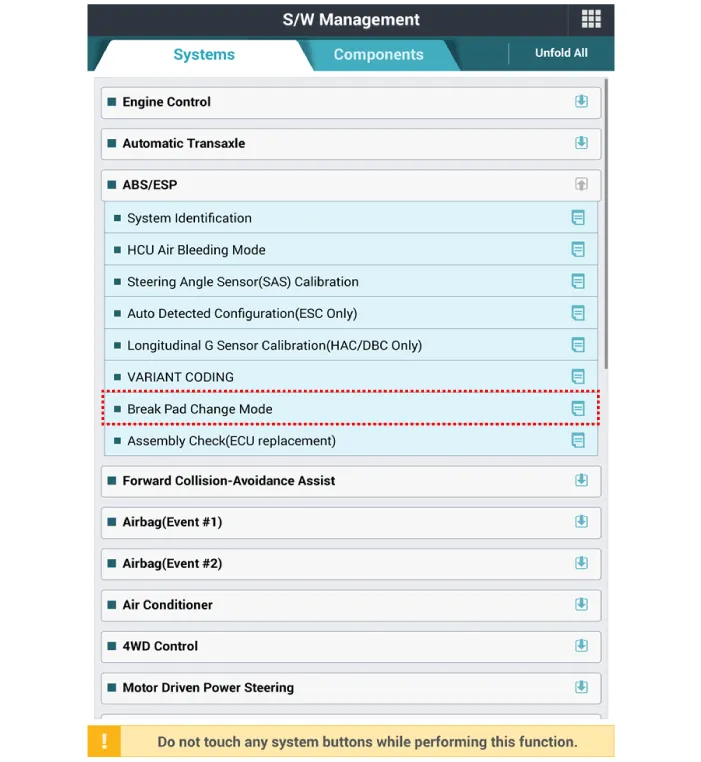
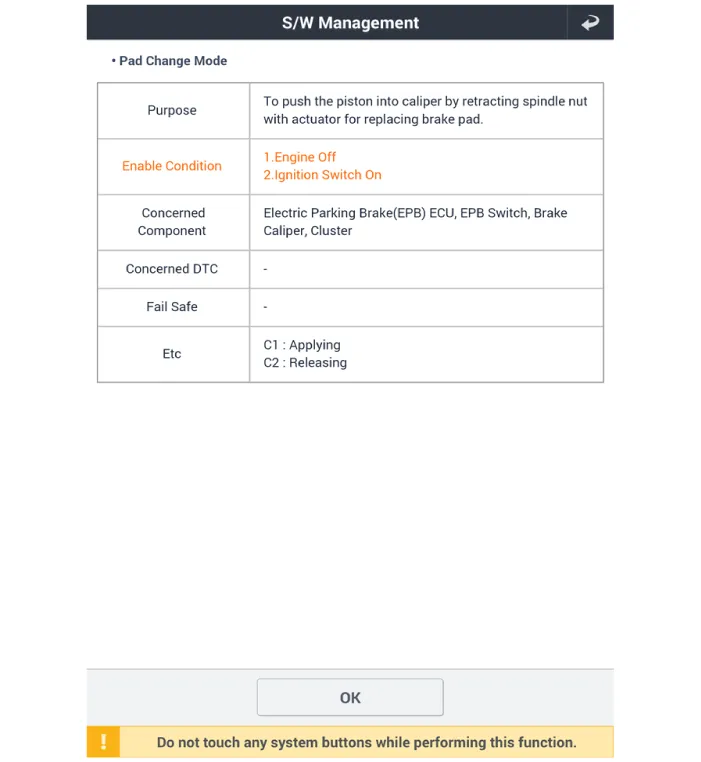
14. Select C1 (Apply) on the screen below.
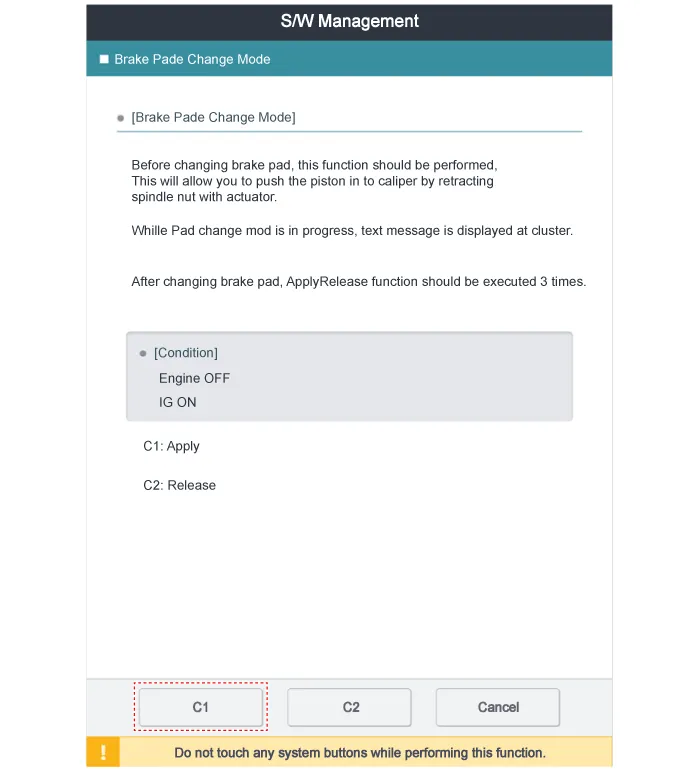

• After replacing the brake pad is complete, make sure to repeat engagement/disengagement 3 times at "Brake Pad Replacement Mode".
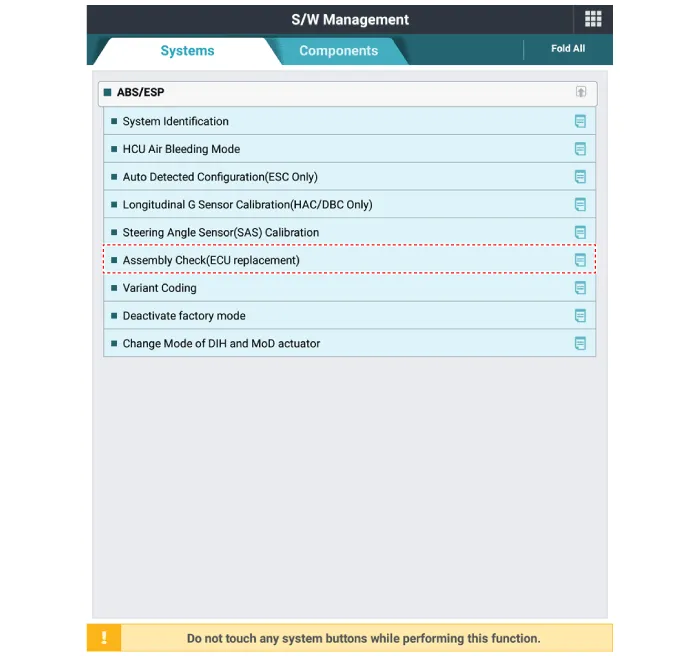
15.After replacing the brake pad, make sure that the caliper is installed correctly by performing "Check assembling (ECU replaced)" from the optional function.
16.After disassembling/assembling the caliper body or replacing the brake caliper, parking brake cable or brake disc, re-adjust the parking brake. [EPB None Apply]
17.Apply the parking brake several times and check for normal operation.
18.Check if the parking brake is operating normally.
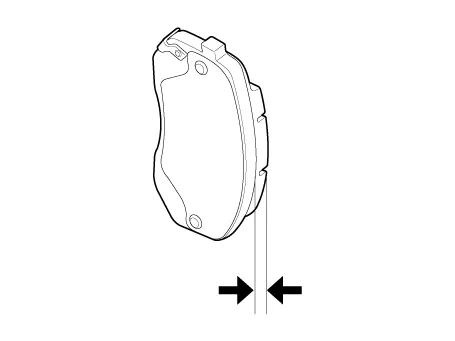
1.Check the pad wear. Measure the pad thickness and replace it, if it is less than the specified value.
Front brake disc thickness Pad thickness- Standard : 11 mm (0.43 in)- Service Limit : 2.0 mm (0.07 in)
2.Check that grease is applied, to sliding contact points and the pad and backing metal for damage.
1.Check the pad wear. Measure the pad thickness and replace it, if it is less than the specified value.
Pad thicknessStandard value : 10.0 mm (0.39 in)Service limit : 2.0 mm (0.07 in)
2.Check the damage of pad, backing metal and contamination with grease.
 Rear Disc Brake
- Removal
1.Before removing the rear caliper, perform “Brake Pad Replacement
Mode” using the self-diagnosis.Raise the vehicle, and make sure it is
securely supported. • Release the EPB, p ...
 Stop Lamp Switch
- Components
1. Brake member assembly2. Stop lamp switch3. Brake pedal arm assembly4. Brake pedal pad
- Schematic Diagram
- System circuit diagram
- Terminal Function
Tem ...
Other information:
Hyundai Santa Cruz (NX4A OB) 2021-2025 Service Manual: Schematic Diagrams
- System Block Diagram
Component Parts And Function Outline
Component partFunction
Vehicle-speed sensor, ESP/ABS Control ModuleConverts vehicle speed to pulse.
ECMReceives signals from sensor and control switches.
Cruise control indicatorIlluminate when CRUISE main switch is ON (Built into ...
Hyundai Santa Cruz 2021-2025 Owners Manual: Vehicle Auto-Shut Off
If your vehicle is parked and the engine
is left on for a long period of time, the
engine will turn off automatically to help
reduce fuel consumption and prevent
accidents caused by carbon dioxide
poisoning.
Operating conditions vehicle autoshut
off timer operates'
when all the following condi ...
